A soil nutrient sensor can show you the nutrient levels in the soil, helping you make informed decisions for your plants’ health. This tool is a game-changer for all gardeners, whether you’re experimenting with vertical gardening techniques or exploring smart gardening solutions to enhance your setup. It reveals important soil details that are key to successful gardening.
This guide will teach you how to use a soil nutrient sensor effectively. You’ll learn the basics of these sensors, how to set them up, and how to interpret the data they collect.
With this knowledge, you can adjust your gardening practices to better suit your plants’ needs and enhance their growth. By the end, you’ll know everything to elevate your gardening with this innovative tool.
Table of Contents
ToggleWhat Is a Soil Nutrient Sensor?
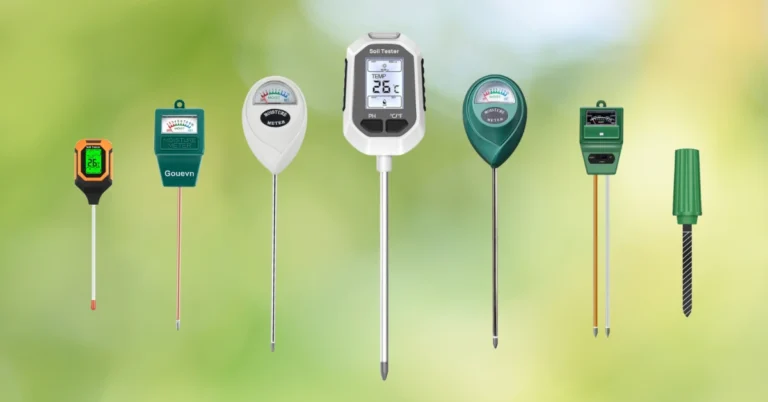
Soil nutrient sensors are smart devices that help you peek into the hidden world beneath your plants’ feet. These tools give you a clear picture of what’s going on in your soil, making it easier to keep your plants happy and healthy.
Types of Soil Nutrient Sensors
These sensors can be broadly categorized into a few types, each suitable for different needs and precision levels:
- Electrochemical Sensors. These sensors measure nutrients directly through the soil’s ionic content. They are great for detecting specific nutrients like nitrogen, phosphorus, and potassium. Electrochemical sensors provide quick results and are commonly used for more scientific or commercial purposes.
- Optical Sensors. Using light to measure nutrients, optical sensors are less common but highly effective for certain applications. They work by emitting light into the soil and analyzing the reflected wavelengths to determine nutrient content.
- Digital Soil Nutrient Sensors. Digital sensors are easy to use, connect well with digital devices, and usually include apps that simplify data interpretation. They’re perfect for gardeners who need clear, simple readings.
- Electrical Sensors. These sensors measure the electrical conductivity of the soil, which can reveal nutrient levels, salinity, and moisture content. They provide quick soil health assessments and are commonly used in precision agriculture to enhance fertilization and irrigation strategies.
- Electromagnetic Sensors. Similar to electrical sensors, these devices use electromagnetic fields to assess soil properties. They are particularly good at measuring soil texture and water content, which indirectly affect nutrient availability. These sensors are typically used for larger-scale agricultural operations where mapping of soil attributes over large areas is necessary.
- Ion-Selective Sensors. These are highly specialized sensors that can measure specific ions in the soil, such as nitrate, potassium, or phosphate. Ion-selective sensors are key when you need precise measurements of specific nutrients. They are ideal for scientific research and sophisticated gardening, where exact nutrient control is essential.
- DIY Sensors. If you’re a gardening enthusiast or on a budget, DIY soil nutrient sensors are for you. They work using basic components like Arduino or Raspberry Pi. They offer a customizable approach to soil testing, though they may require more technical knowledge to set up and interpret.

HOT TIP
When choosing a soil nutrient sensor, it’s important to consider which nutrients are most critical for your plants’ growth. Choose a sensor type that best meets the specific needs of your garden. Regularly calibrating your sensor ensures accuracy, so your plants always get what they need to thrive.
Comparative Analysis of Soil Sensor Types
When choosing a soil nutrient sensor for your garden, it’s important to compare the accuracy, cost, and ease of use of different types. Here’s a breakdown to help you choose the right one:
- Electrochemical Sensors:
- Accuracy: High precision in measuring specific nutrients directly from the soil.
- Cost: Generally more expensive due to sophisticated technology.
- Ease of Use: Might need some technical knowledge to use and interpret data, especially for specific ion measurements.
- Optical Sensors:
- Accuracy: Provide detailed data on nutrient levels through advanced optical measurements.
- Cost: Tend to be on the higher end, like electrochemical sensors, because of their advanced technology.
- Ease of Use: Less user-friendly for casual gardeners. Best suited for scientific or large-scale agricultural applications.
- Digital Soil Nutrient Sensors:
- Accuracy: Generally reliable for everyday gardening needs, though less precise than scientific-grade sensors.
- Cost: More affordable and offers good value for the features provided.
- Ease of Use: User-friendly with digital readouts and often smartphone app integration. Ideal for beginners and intermediate gardeners.
- Electrical and Electromagnetic Sensors:
- Accuracy: Good for assessing soil composition and water content but less specific for nutrients unless combined with other sensor types.
- Cost: Mid-range, providing a good balance between cost and functionality.
- Ease of Use: Fairly straightforward, often used in larger-scale operations but adaptable to smaller settings.
- Ion-Selective Sensors:
- Accuracy: Extremely high, as they can measure specific ions in the soil very precisely.
- Cost: These are usually the most expensive due to their specialized nature.
- Ease of Use: Requires technical knowledge and careful calibration to ensure accuracy.
- DIY Sensors:
- Accuracy: This varies widely depending on the components used and the builder’s skill level.
- Cost: Can be inexpensive, especially if using common electronic components.
- Ease of Use: Requires a good understanding of electronics and programming, which might not be suitable for all gardeners.

HOT TIP
Before buying a soil nutrient sensor, consider renting different types to test in your garden. This can help you determine which sensor best meets your needs without the initial full investment. Always balance the cost against how critical precise nutrient data is for your gardening success.
How Soil Nutrient Sensors Work
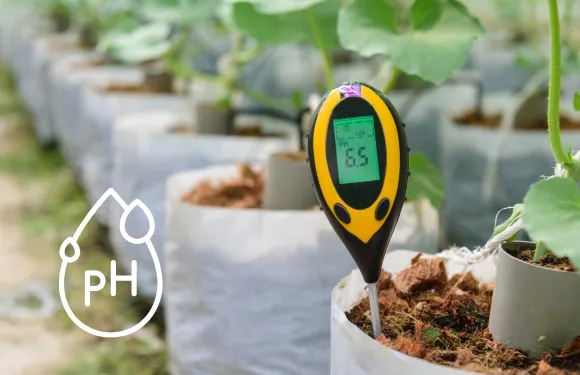
Soil nutrient sensors are smart gardening devices that check the nutrient content of your soil. They give important details on which nutrients are missing or present in your soil. Here’s how they generally work:
- Sampling Method. Some sensors need a small sample of soil, while others have probes that are directly inserted into the soil at various depths depending on the root zone of interest.
- Technology in Action. Once in contact with the soil, the sensor activates its specific technology to analyze the nutrient content. For example:
- Electrochemical Sensors. These sensors detect changes in electrical conductivity or potential that vary with nutrient concentration.
- Optical Sensors. These use light to probe the soil. They emit light onto the soil and measure the light’s intensity as it reflects back, which changes according to the soil’s properties.
- Data Interpretation. The sensor processes the readings and convert them into understandable data. The data is often displayed as the concentration of various nutrients present in the soil.
- Output. The results are typically displayed on a digital interface. They can also be sent to a smartphone or computer where the data can be further analyzed or stored for long-term tracking.

HOT TIP
For accurate readings, regularly calibrate your soil nutrient sensor as the manufacturer suggests. Calibration keeps the sensor accurate even with heavy use or when used in different soil types.
Benefits of Using Soil Nutrient Sensors
Using a soil nutrient sensor can be a game-changer for your garden or farm. Here’s why:
- Better plant health: By knowing exactly what’s in your soil, you can give your plants what they need to thrive.
- Save money on fertilizer: You’ll know when and how much fertilizer to use, avoiding waste.
- Protect the environment: By using only the nutrients your plants need, you help reduce runoff that can harm nearby water sources.
- Real-time info: Many sensors can give you up-to-date info about your soil, allowing you to make quick decisions.
- Improved crop yields: With the right balance of nutrients, your plants are more likely to produce a better harvest.
- Soil health tracking: Over time, you can see how your soil changes and take steps to keep it in top shape.
By using a soil nutrient sensor, you’re taking a big step towards smarter, more efficient gardening or farming. It’s like having a tiny lab right in your backyard, helping you make the best choices for your plants and the environment.
How to Set Up Your Soil Nutrient Sensor
Here’s how to get started:
- Choose the Location: Select a spot in your garden that represents the general soil conditions of the area where you plan to grow your plants. Avoid areas near recent fertilizer applications or unusual soil disturbances.
- Insert the Sensor: Carefully insert the probe of the soil nutrient sensor into the soil. Make sure it’s deep enough to reach the root level of your plants but not so deep that it disrupts the root system. For most sensors, insertion at a depth of 3-6 inches is adequate.
- Connect to a Device: If your sensor is digital, connect it to your smartphone, tablet, or computer using Bluetooth or Wi-Fi as per the manufacturer’s instructions. This will allow you to read and record the data.
- Calibrate the Sensor: Follow the calibration instructions provided with your sensor. This usually involves inserting the sensor into a calibration solution or performing a specific procedure in the soil to ensure accurate readings.
- Start Monitoring: Once set up and calibrated, you can start monitoring the nutrient levels. Regular monitoring will help you make better choices about fertilization and other soil needs.

HOT TIP
Before starting a new monitoring cycle, check the battery level of your soil nutrient sensor, especially if it will be left in the field for a long time. This prevents losing important data due to battery failure. Also, clean the sensor regularly and store it in a safe, dry place when not in use to help it last longer and stay accurate.
Proper sensor placement
Where you put your soil nutrient sensor matters a lot. To get the best results, place your sensor in an area that represents most of your field. This means finding a spot with the main soil type, typical terrain, and average yield.
If you’re using furrow irrigation, put the sensor about halfway to two-thirds down the furrow. This helps you avoid areas that get too wet or too dry. Also, place the sensor at least two planter passes inward from the edge of your field. This way, you steer clear of any edge effects like tree lines or pesticide drift.
When it comes to depth, using sensors at different levels is a good idea. Many farmers put sensors at 6, 12, 24, and 36 inches deep. This gives you a full picture of what’s happening in your soil from the surface down to where the roots grow.
Calibrating your sensor
Calibrating your soil nutrient sensor is key to getting accurate readings. Start by setting up a few sensors in your lab and testing them in different soil types. This helps you understand how they work before you head out to the field.
When you’re ready to calibrate in the field, collect about 4 liters (1 gallon) of soil from the area where you’ll be using the sensor. Make sure it’s from the right depth too. Spread this soil out to air dry, then remove any large objects or break up big clumps.
Pack the soil into a calibration container, trying to match the density it had in the field. Insert your sensor carefully, making sure there are no air gaps around it. Take a reading, and then collect a sample of the soil to measure its actual moisture and nutrient content.
Repeat this process, adding water to the soil each time, until you have 4-6 calibration points. This range of moisture levels helps your sensor give accurate readings in different conditions.
Remember, calibration isn’t a one-time thing. It’s a good idea to check your sensors regularly and recalibrate if needed. This way, you’ll always have reliable data to help you make the best decisions for your plants’ health.
How to Choose the Right Soil Nutrient Sensor
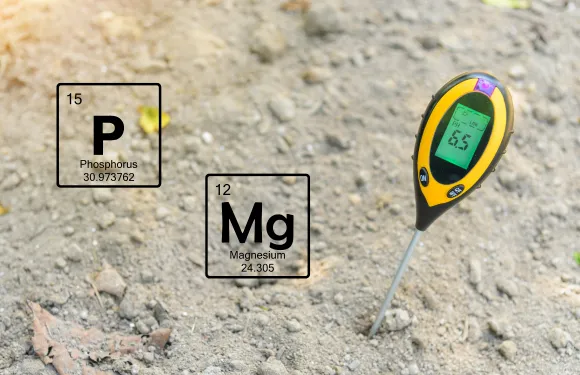
Choosing the right soil nutrient sensor depends on your specific gardening needs and the level of detail you need. Here’s how to make the best choice:
- Determine Your Needs. Consider what nutrients you need to monitor. If you only need basic information, a simple sensor might suffice. But, if you need detailed analysis for various nutrients, you might need a more advanced sensor.
- Research Sensor Types. Understand the differences between sensor types such as electrochemical, optical, and digital sensors. Electrochemical sensors are great for precise measurements of specific ions, while optical sensors are better suited for non-invasive, quick checks.
- Check Compatibility. Ensure the sensor is compatible with other devices you use. This is crucial if you prefer a digital approach to monitoring your garden.
- Read Reviews. Look at reviews from other users to determine the reliability and accuracy of the sensor. Reviews can also provide insight into the sensor’s ease of use and customer support.
- Determine a Budget. More advanced sensors can be more expensive, but investing in a reliable sensor can save you time and resources in the long run.
- Warranty and Support. Check if the sensor comes with a warranty or customer support. Good support can be invaluable for troubleshooting and advice on best practices.

HOT TIP
Before making your final decision, consider renting or borrowing different types of sensors to test in your garden. This can help you find the sensor that best fits your needs without committing to a purchase right away. This hands-on experience can be very informative and ensure you get the most suitable sensor for your garden’s conditions.
Interpreting Soil Nutrient Sensor Data
Understanding the data from your soil nutrient sensor is key to maintaining a healthy garden. Here’s how to interpret the info provided by your soil nutrient sensor:
- Key Nutrients to Monitor:
- Nitrogen (N): Essential for leaf growth and green color.
- Phosphorus (P): Important for root development and flower/fruit production.
- Potassium (K): Helps with overall plant health and disease resistance.
- Consider also monitoring calcium, magnesium, and sulfur, depending on your specific crop needs.
- Optimal Nutrient Ranges for Common Crops:
- Leafy Greens (e.g., spinach, lettuce): Need higher nitrogen for leaf development.
- Fruiting Vegetables (e.g., tomatoes, peppers): Need a balanced intake of nitrogen and phosphorus to support both growth and fruiting.
- Root Vegetables (e.g., carrots, beets): Need higher phosphorus levels to encourage root growth.
Always adjust nutrient levels based on the specific needs of your plants, which can vary by species and growth stage.
- Addressing Nutrient Deficiencies:
- Yellowing Leaves: Often a sign of nitrogen deficiency.
- Poor Flower Development: Can indicate a lack of phosphorus.
- Small Leaves or Stunted Growth: Might suggest a potassium deficiency.
Use your soil nutrient sensor data to pinpoint which nutrients are lacking and adjust your soil amendments accordingly.
Follow these guidelines to use your soil nutrient sensor effectively, and ensure your garden stays healthy and productive.

HOT TIP
Regularly calibrate your soil nutrient sensor to ensure the accuracy of the data you receive. Always compare sensor data with visible signs on your plants to make better decisions about fertilization and care. Combining technology with hands-on observation ensures your plants get exactly what they need to grow and thrive.
Optimizing Plant Growth with Soil Sensor Data
Using data from your soil nutrient sensor can significantly enhance how you manage plant growth. Here’s how you can optimize your gardening strategy:
- Adjust Fertilizer Application
- Use soil nutrient sensor data to tailor your fertilizer applications to the specific needs of your plants. If the sensor indicates a deficiency in nitrogen, you can adjust your fertilizing schedule to add more nitrogen-rich products.
- Be mindful of the nutrient load to avoid over-fertilization, which can be harmful. Adjusting the type and quantity of fertilizer based on real-time data helps prevent nutrient runoff and ensures healthier plant growth.
- Fine-Tune Irrigation
- Sensor data can guide you on when and how much to water based on the soil’s moisture content and nutrient levels. Proper irrigation is crucial for dissolving nutrients and making them available to plant roots.
- Water wisely to keep nutrients from washing away or staying out of reach in dry soil.
- Keep a Record of Nutrient Trends
- Keep a record of nutrient levels throughout the season. This historical data can reveal trends and help you predict future nutrient needs. For example, if you notice a consistent decline in potassium during the mid-growth stages, you can plan to supplement potassium proactively in future cycles.
- Understanding long-term nutrient trends allows for more precise adjustments in both fertilizer composition and application schedules, aligning them perfectly with plant growth phases.

HOT TIP
Integrate your soil nutrient sensor data with a garden management app to automate data tracking and analysis. This integrationwill tell you when adjustments are needed. It will alsoo offer insights into the best times for fertilization and watering, making your gardening more efficient and your plants more productive.
Integrating Soil Nutrient Sensors with Smart Gardening Systems
Linking soil nutrient sensors to smart gardening systems improves monitoring and makes urban gardening more efficient. Here’s how to do it:
- Choose a Compatible System. Ensure your soil nutrient sensors are compatible with smart home platforms like Google Home, Amazon Alexa, or Apple HomeKit. This compatibility allows for seamless integration.
- Set Up Connectivity. Most modern soil nutrient sensors come equipped with Wi-Fi or Bluetooth capabilities. Connect these sensors to your smart home network to start sending data directly to your smartphone or smart home system.
- Automate Responses. Use smart home apps to set rules or actions based on the data received from your sensors. For example, if a sensor detects a deficiency in moisture or specific nutrients, your system can automatically trigger irrigation or notify you to adjust fertilization.
- Monitor and Adjust. You can continuously track soil conditions and make real-time adjustments from anywhere.
If you want to upgrade your garden with smart plant sensors, check out our guide: Smart Plant Sensors: Grow Healthier Plants With Less Effort.
DIY Smart Soil Nutrient Monitoring System (For Tech-Savvy Gardeners)
Creating your own soil nutrient monitoring system with tools like Raspberry Pi is a fun and customizable project for your garden’s specific needs. Here’s how to build one.
- Gather Components. You will need a Raspberry Pi, soil nutrient sensors (like pH, moisture, or NPK sensors), and basic electronic components such as wires and possibly a breadboard for connections.
- Configure the Raspberry Pi. Install the necessary software on your Raspberry Pi. This might include the operating system (like Raspbian) and libraries for sensor data reading and handling.
- Connect Sensors to Raspberry Pi. Wire your sensors to the Raspberry Pi according to the sensors’ specifications. Ensure secure connections to avoid data transmission errors.
- Develop a Monitoring Application. Write a program or use existing software to read the data from the sensors. This application can display the data locally on a screen or send it to your phone or computer.
- Test and Calibrate. Once your system is set up, test and calibrate your sensors according to the instructions provided with the sensors. Calibration is crucial for accurate readings.
If you want to learn more about Smart Gardening, read our comprehensive guide: Smart Gardening: The Ultimate Guide to High-Tech Gardening Solutions.
Or, if you want to use smart tech for your indoor garden, our guide on smart indoor gardening is a must read.

HOT TIP
For an extra layer of data analysis, consider using cloud-based data logging services that can store your soil data over time. This allows you to analyze long-term trends and gain deeper insights into your soil’s health, which can inform more precise adjustments in your gardening practices. Integrating these technologies not only saves time but also ensures that your plants receive exactly what they need for optimal growth.
Seasonal Gardening Tips Based on Soil Nutrients
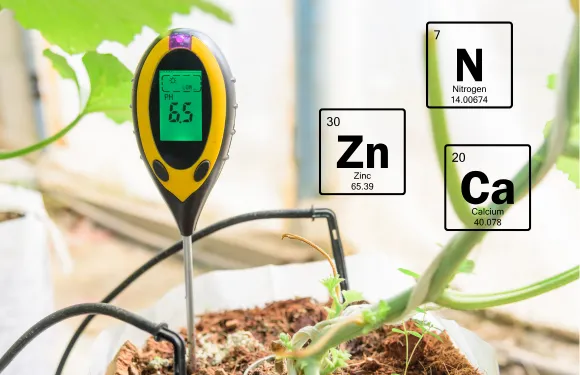
Adjusting your gardening practices based on seasonal changes in soil nutrient levels can greatly enhance plant health and yield. Here’s how to optimize your gardening schedule throughout the year:
- Spring Preparation
- Test soil nutrients early in the season as temperatures begin to rise. Spring is a critical time for replenishing nutrients that may have been spent over winter.
- Focus on adding nitrogen-rich fertilizers to promote vigorous leaf growth, which is vital as plants start to come out of dormancy.
- Summer Maintenance
- Monitor nutrient levels closely, especially for fast-growing plants that can deplete soil nutrients quickly. Summer crops like tomatoes and peppers might need supplemental feeding with phosphorus and potassium to support flowering and fruiting.
- Consider light, frequent applications of nutrients to avoid buildup in the soil, which can be common in hot, dry conditions.
- Autumn Adjustments
- As growth slows, reduce nitrogen application to prevent lush foliage that can be damaged by early frosts. Instead, enhance potassium levels to improve overall plant hardiness and disease resistance.
- This is also a good time to add organic matter like compost, which slowly releases nutrients and improves soil structure over the winter.
- Winter Planning
- Test soil after the growing season ends to assess what nutrients have been depleted throughout the year.
- Apply lime if needed to adjust soil pH and ensure nutrient availability for the next growing season.

HOT TIP
Use a soil nutrient sensor to continuously track your soil’s condition throughout each season. This data can help you apply exactly what your garden needs right when it needs it, avoiding guesswork and waste. Additionally, keeping a garden journal with entries on soil conditions, what was planted, and how plants responded to adjustments can be invaluable for planning future gardens.
Mistakes to Avoid When Using a Soil Nutrient Sensor
One common mistake when using a soil nutrient sensor is failing to calibrate the device before use. Calibration is key for ensuring accurate readings, as soil composition can vary across different locations. Many users overlook this step, leading to unreliable data and potentially misguided decisions in crop management.
Also, not cleaning the sensor probes between readings can result in cross-contamination and skewed results, especially when testing different areas of a field or multiple fields.
Another critical error is misinterpreting the sensor data without considering other environmental factors. Soil nutrient levels are influenced by various elements such as pH, moisture content, and temperature. Relying solely on the sensor readings without taking these factors into account can lead to incorrect conclusions about soil health and fertility.
Some users make the mistake of taking only a few samples from unrepresentative areas, which can provide an incomplete or inaccurate picture of the overall soil nutrient status. To avoid these pitfalls, it’s essential to follow proper sampling techniques and integrate sensor data with other soil testing methods for a comprehensive assessment.
Conclusion
Soil nutrient sensors are game-changers for gardeners and farmers. They give a peek into what’s happening beneath the surface, helping us make smart choices for our plants’ health.
By using these clever tools, we can fine-tune our approach to fertilizing, watering, and caring for our crops. This means healthier plants, better yields, and less waste of resources.
Soil nutrient sensors are our partners in creating thriving gardens and fields. They help us understand our soil better, track changes over time, and respond quickly to our plants’ needs.
Whether you have a small backyard garden or managing a large farm, a soil nutrient sensor can be your secret weapon to boost plant growth. So why not give it a try? Your plants (and the environment) will thank you!
Frequently Asked Questions
What is a soil nutrient sensor?
A soil nutrient sensor is a device that measures the levels of various nutrients in the soil, such as nitrogen, phosphorus, and potassium, to help gardeners optimize plant health and growth.
How do soil nutrient sensors work?
Soil nutrient sensors typically use electrochemical or optical methods to detect and quantify specific nutrients in the soil. They provide readings that can guide fertilization and watering practices.
Why should I use a soil nutrient sensor in my garden?
Using a soil nutrient sensor can help you understand the nutrient status of your soil, allowing you to apply the right amount of fertilizer and water. This ensures your plants get exactly what they need for optimal growth and helps prevent over-fertilization and nutrient runoff.
How often should I check soil nutrients with a sensor?
It’s a good idea to check soil nutrients at the start of the growing season to establish a baseline, and then periodically throughout the growing season to monitor changes and adjust your gardening practices accordingly.

